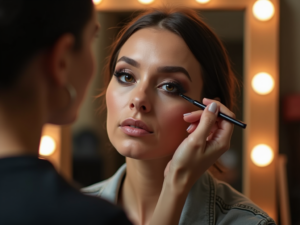
Mastering the perfect winged eyeliner can seem daunting, but with the right techniques suited to your unique eye shape, it’s entirely achievable. This comprehensive guide explores various methods to help you craft the ideal winged eyeliner look that enhances your natural beauty, regardless of your eye shape. From almond to hooded eyes, we’ve got you covered with tailored advice to make your eyeliner application process as smooth and flawless as possible.
Understanding Eye Shapes

Before you can nail the perfect winged eyeliner, you must first understand your eye shape, as this will influence the style and angle of the wing you should aim for. Eye shapes are often categorized into several types: almond, round, monolid, hooded, and downturned, among others. Identifying your eye shape can greatly assist in applying makeup that complements your features. To determine your eye shape, observe your eyes in the mirror or take a photograph to see if they taper upwards, round out, or have a noticeable crease.
- Look straight into the mirror: Check if you can see your crease, and notice its size and placement.
- Do your eyelids cover most of your upper eyes? If yes, you might have hooded eyes.
- If your eyes are wide and slightly taper upwards at the corners, they might be almond-shaped.
Perfecting Winged Eyeliner for Almond Eyes
Almond eyes are considered one of the most versatile shapes when it comes to winged eyeliner. A classic cat-eye look beautifully complements almond eyes by enhancing their naturally lifted appearance. Start by drawing a thin line from the inner corner of the eyelashes to the outer corner. As you reach the outer corner, gently flick your eyeliner upward following the natural curve of your eye. This lifts the eyes elegantly, creating a timeless and sultry look.
Steps for Almond Eyes:
- Begin at the inner corner with a thin line close to the lashes.
- Gradually thicken the line as you move to the outer corner.
- Create the wing by extending the line upwards, parallel to the lower lash line.
Techniques for Round Eyes
Round eyes can appear more defined and elongated with the right winged eyeliner technique. This effect is achieved by applying a thicker eyeliner on the outer half of your eye. Start the line slightly before the middle of your eyelid, staying thin initially, and then gently build up the thickness towards the outer edges. Focus on creating a sharp wing that sweeps outwards rather than upwards, as this will lengthen the eye instead of making it look more rounded.
For hooded eyes, visibility can be a challenge due to the natural fold of the skin. A common technique to overcome this involves outlining the wing with your eyes open to visualize how it will look. Begin by drawing the shape of your wing with your eyes open, ensuring it’s noticeable above the fold. Once satisfied with the outline, fill it in with your eyeliner. Keep the rest of the eyelid line thin to avoid overcrowding the lid area.
Consider using these Steps:
- Create a guideline with eyes open for proper visibility when closed.
- Stick to a thin line over the rest of the lid to maximize visible space.
- Apply waterproof eyeliner to reduce smudging over the folds.
The Right Winged Style for Monolid Eyes
Monolid eyes, typically characterized by a lack of a prominent crease, can be beautifully enhanced with a bold, striking wing. This calls for playing around with thickness to make a visible impact. Start by applying a broad line across the lashes, which can be extended outwards and thickened to create a dramatic wing. Use a gel or liquid liner for precise application, as these formulas dry quickly and maintain their shape without bleeding into the area around your eye.
Pro Tips:
- Emphasize the outer corners for a more pronounced look.
- Maintain consistency in thickness for a cohesive appearance.
- Avoid thin liners as they might not be visible enough when the eyes are open.
Conclusion
Achieving the perfect winged eyeliner is a journey of understanding and embracing your unique eye shape. By tailoring your technique to suit almond, round, hooded, or monolid eyes, you create not only a flawless makeup look but also a boost in confidence. Remember that practice is key, and with the right tools and patience, you’ll master the winged eyeliner look in no time. Don’t hesitate to experiment with different liners and angles until you discover what works best for your beautiful eyes.
Frequently Asked Questions
- 1. What type of eyeliner is best for beginners? For beginners, gel liner in a pot with a brush or a felt tip liquid liner is recommended due to ease of control and precision. They offer good color payoff and are easier to handle than pencil liners.
- 2. How can I make my winged eyeliner last all day? To ensure longevity, use a primer on your eyelids before applying eyeliner. Choose a waterproof formula to prevent smudging and seal your look with a setting spray.
- 3. Can I use eyeshadow to create a winged look? Yes, using a small angled brush with dark eyeshadow can create a softer, smokey winged look. This method is also forgiving if you’re new to eyeliner.
- 4. What’s the trick to getting both wings even? For symmetry, start by drawing small dots or dashes to map out your desired shape before connecting them. Using tape or a business card as a guide can also help create even lines.
- 5. How do I fix mistakes without starting over? Use a small amount of makeup remover on a cotton swab to correct mistakes. Alternatively, a concealer brush can help to sharpen lines or fix smudges without messing up your base makeup.